Routing audio cable 1 from Composer to Performer (4-channel). Composer side (cyan window title in my screenshots).
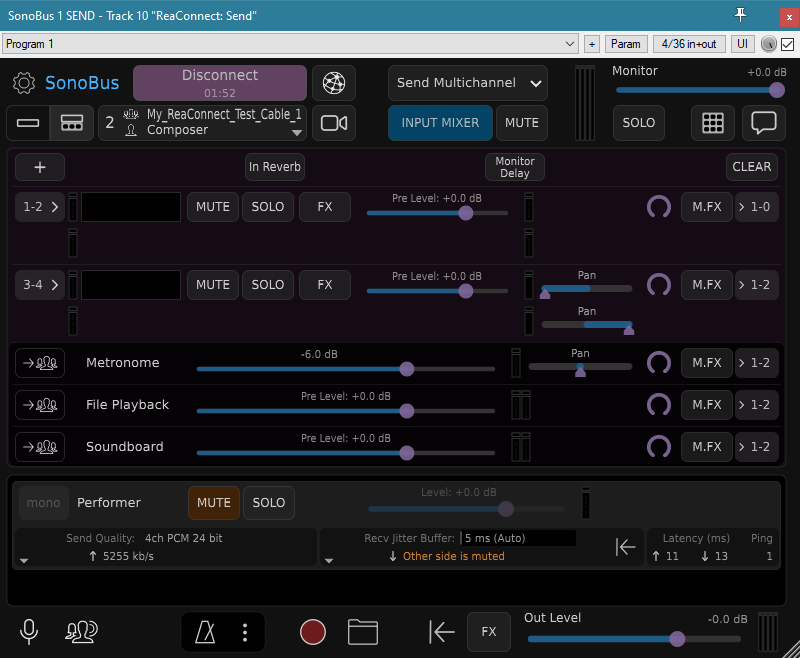
First we connect to a SonoBus group, I named it "My_ReaConnect_Test_Cable_1" but you should definitely use something unique for yourself. Just change the word "My" to whatever. Then we name this side "Composer", then we click Connect. You can see that SonoBus is connected in the top left corner. Then we click on INPUT MIXER in Sonobus, then on [+] button and so we add a STEREO channel. Now we have 1-2 and 3-4 and they are both routed correctly by default by the plugin since they are the inputs.
Routing audio cable 1 from Composer to Performer (4-channel). Performer side (purple window title in my screenshots).
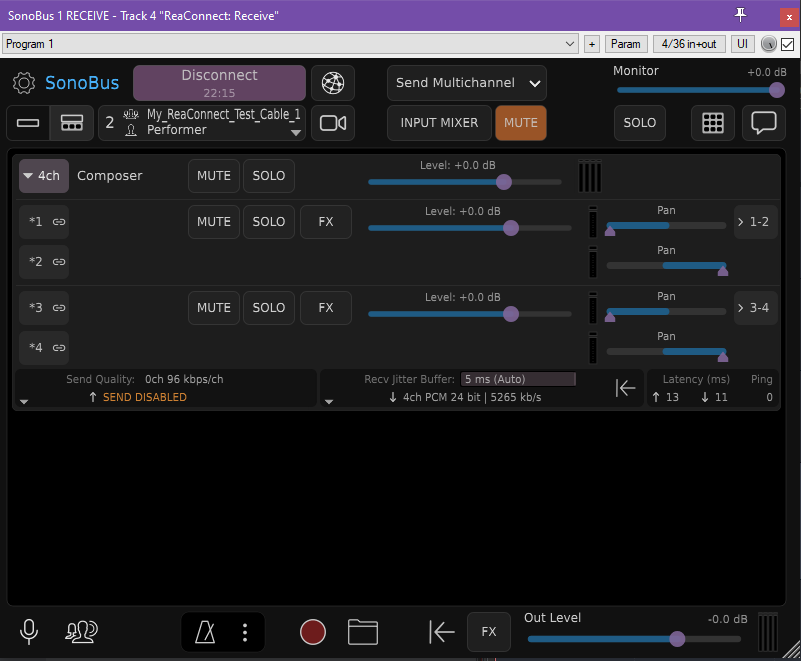
Here we do the same thing to connect to the same SonoBus group, but we name this side in the "Your displayed name" field: "Performer".
Since this is the receiving side of that audio cable, we enable MUTE next to the INPUT MIXER. We are only using OUT on this plug-in instance and hence, we don't care about the INPUT MIXER here and we can MUTE all inputs safely.
Now we have the two instances connected.
Now we want to configure SonoBus to send high quality audio one way only: We click on the small triangle visible on the leftmost bottom side, and choose "DISABLE SENDING" towards Composer (from Performer's side for cable 1), and as you can see in the screenshot here, SonoBus shows "SEND DISABLED" in orange letters to confirm this. Now we want to configure the previous SonoBus to send PCM 24 bit audio (if it is not sending already), so we go back to that SonoBus 1 SEND on the Composer side, we click on the same triangle pointing downwards on the bottom left and there we choose "PCM 24 bit".
Now, back to this SonoBus 1 RECEIVE on the Performer side, we click on the triangle arrow next to the word "4ch" and "Composer" to open routing for this audio cable. Here we can see that 1-2 are routed properly, but 3-4 are not (they are pointing to 1-2 outputs but they should point to 3-4). So we click on the bottom "> 1-2" on the right hand side and we change that into 3-4.
Cable 1 complete.
Routing audio cable 2 from Performer to Composer (6-channel). Performer side (purple window title in my screenshots).
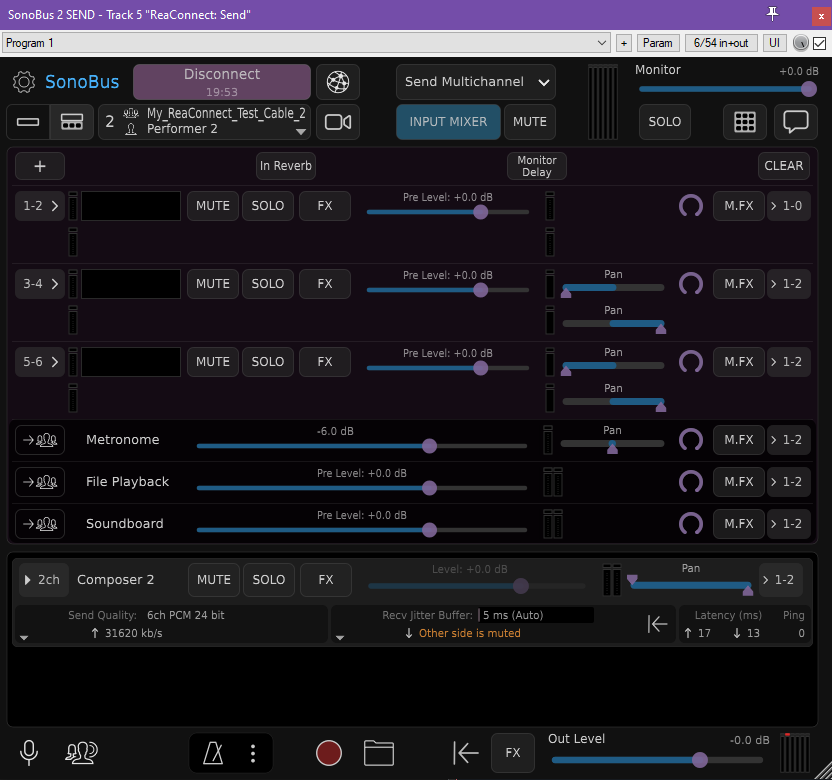
Here we connect to a second, separate SonoBus group, I named it "My_ReaConnect_Test_Cable_2" but you should definitely use something unique for yourself. Just change the word "My" to whatever. Then we name this side "Performer 2", then we click Connect. You can see that SonoBus is connected in the top left corner. Then we click on INPUT MIXER in Sonobus, then on [+] button two times and thus we add two STEREO channels. So now we have 1-2 and 3-4 and 5-6 and they are all routed correctly by default by the plugin since they are the inputs.
Routing audio cable 2 from Performer to Composer (6-channel). Composer side (cyan window title in my screenshots).
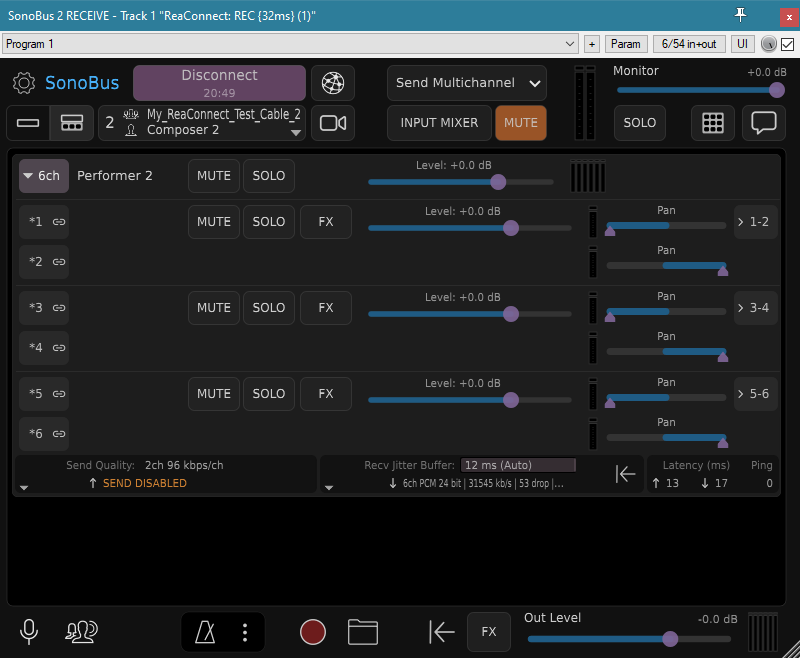
Here we do the same thing to connect to the same SonoBus group, but we name this side in the "Your displayed name" field: "Composer 2".
Since this is the receiving side of that audio cable, we enable MUTE next to the INPUT MIXER. We are only using OUT on this plug-in instance and hence, we don't care about the INPUT MIXER here and we can MUTE all inputs safely.
Now we have the two instances connected. Now we want to configure SonoBus to send high quality audio one way only: We click on the small triangle visible on the leftmost bottom side, and choose "DISABLE SENDING" towards Performer (from Composer's side for cable 2), and as you can see in the screenshot here, SonoBus shows "SEND DISABLED" in orange letters to confirm this. Now we want to configure the previous SonoBus to send PCM 24 bit audio (if it is not sending already), so we go back to that SonoBus 2 SEND on the Performer side, we click on the same triangle pointing downwards on the bottom left and there we choose "PCM 24 bit".
Now, back to this SonoBus 2 RECEIVE on the Composer side, we click on the triangle arrow next to the word "6ch" and "Performer 2" to open routing for this audio cable. Here we can see that 1-2 are routed properly, but 3-4 and 5-6 are not (they are pointing to outputs 1-2 but they should point to 3-4 and 5-6). So we click on the bottom two "> 1-2" on the right hand side and we change that into 3-4 and 5-6 respectively.
Cable 2 complete.
All done.