Let's build fast prototypes for your PMML and ONNX Models
| Quickstart | Examples | Integrate your model | Customization | Architecture |
Tired of building web-applications for your machine learning models to enable users to interact with it? ML-Starter lets you focus on your model performance rather than writing backend- and frontend-code. ML-Starter is built on FastAPI and React. Its integration with Docker allows you to run your application locally or deploy it to a hosting provider such as https://www.heroku.com. User requests and predictions can be saved in a free online MongoDB such as https://www.mongodb.com.
Alpha version: Only suggested for experimental usage.
Try some applications running with ML-Starter here.
- Provides a REST-API for your ONNX or PMML model
- Provides a standard React frontend for your ONNX or PMML model
- Lets you save requests and predictions in an online MongoDB
- Learn from the feedback of your users
- Runs everywhere with Docker
- Minimal configuration and implementation required
- Integrate your own GUI
⭐ Get started with the quickstart or explore the possibilities to integrate your own model here ⭐
What you'll build
The "Hello World" of Machine Learning: An Iris classification model which takes in the measurements of a flower and
predicts the class.
What you'll need
- An IDE such as PyCharm or Visual Studio Code
- Docker installation (https://docs.docker.com/get-docker/)
Either download the repository or copy the command in the commandline:
git clone https://github.com/loki344/ml-starter.git
Locate the custom_model.xml in the ml-starter/backend/examples/iris-classification-pmml/ directory. Copy it to the ml-starter/app/custom_model folder.
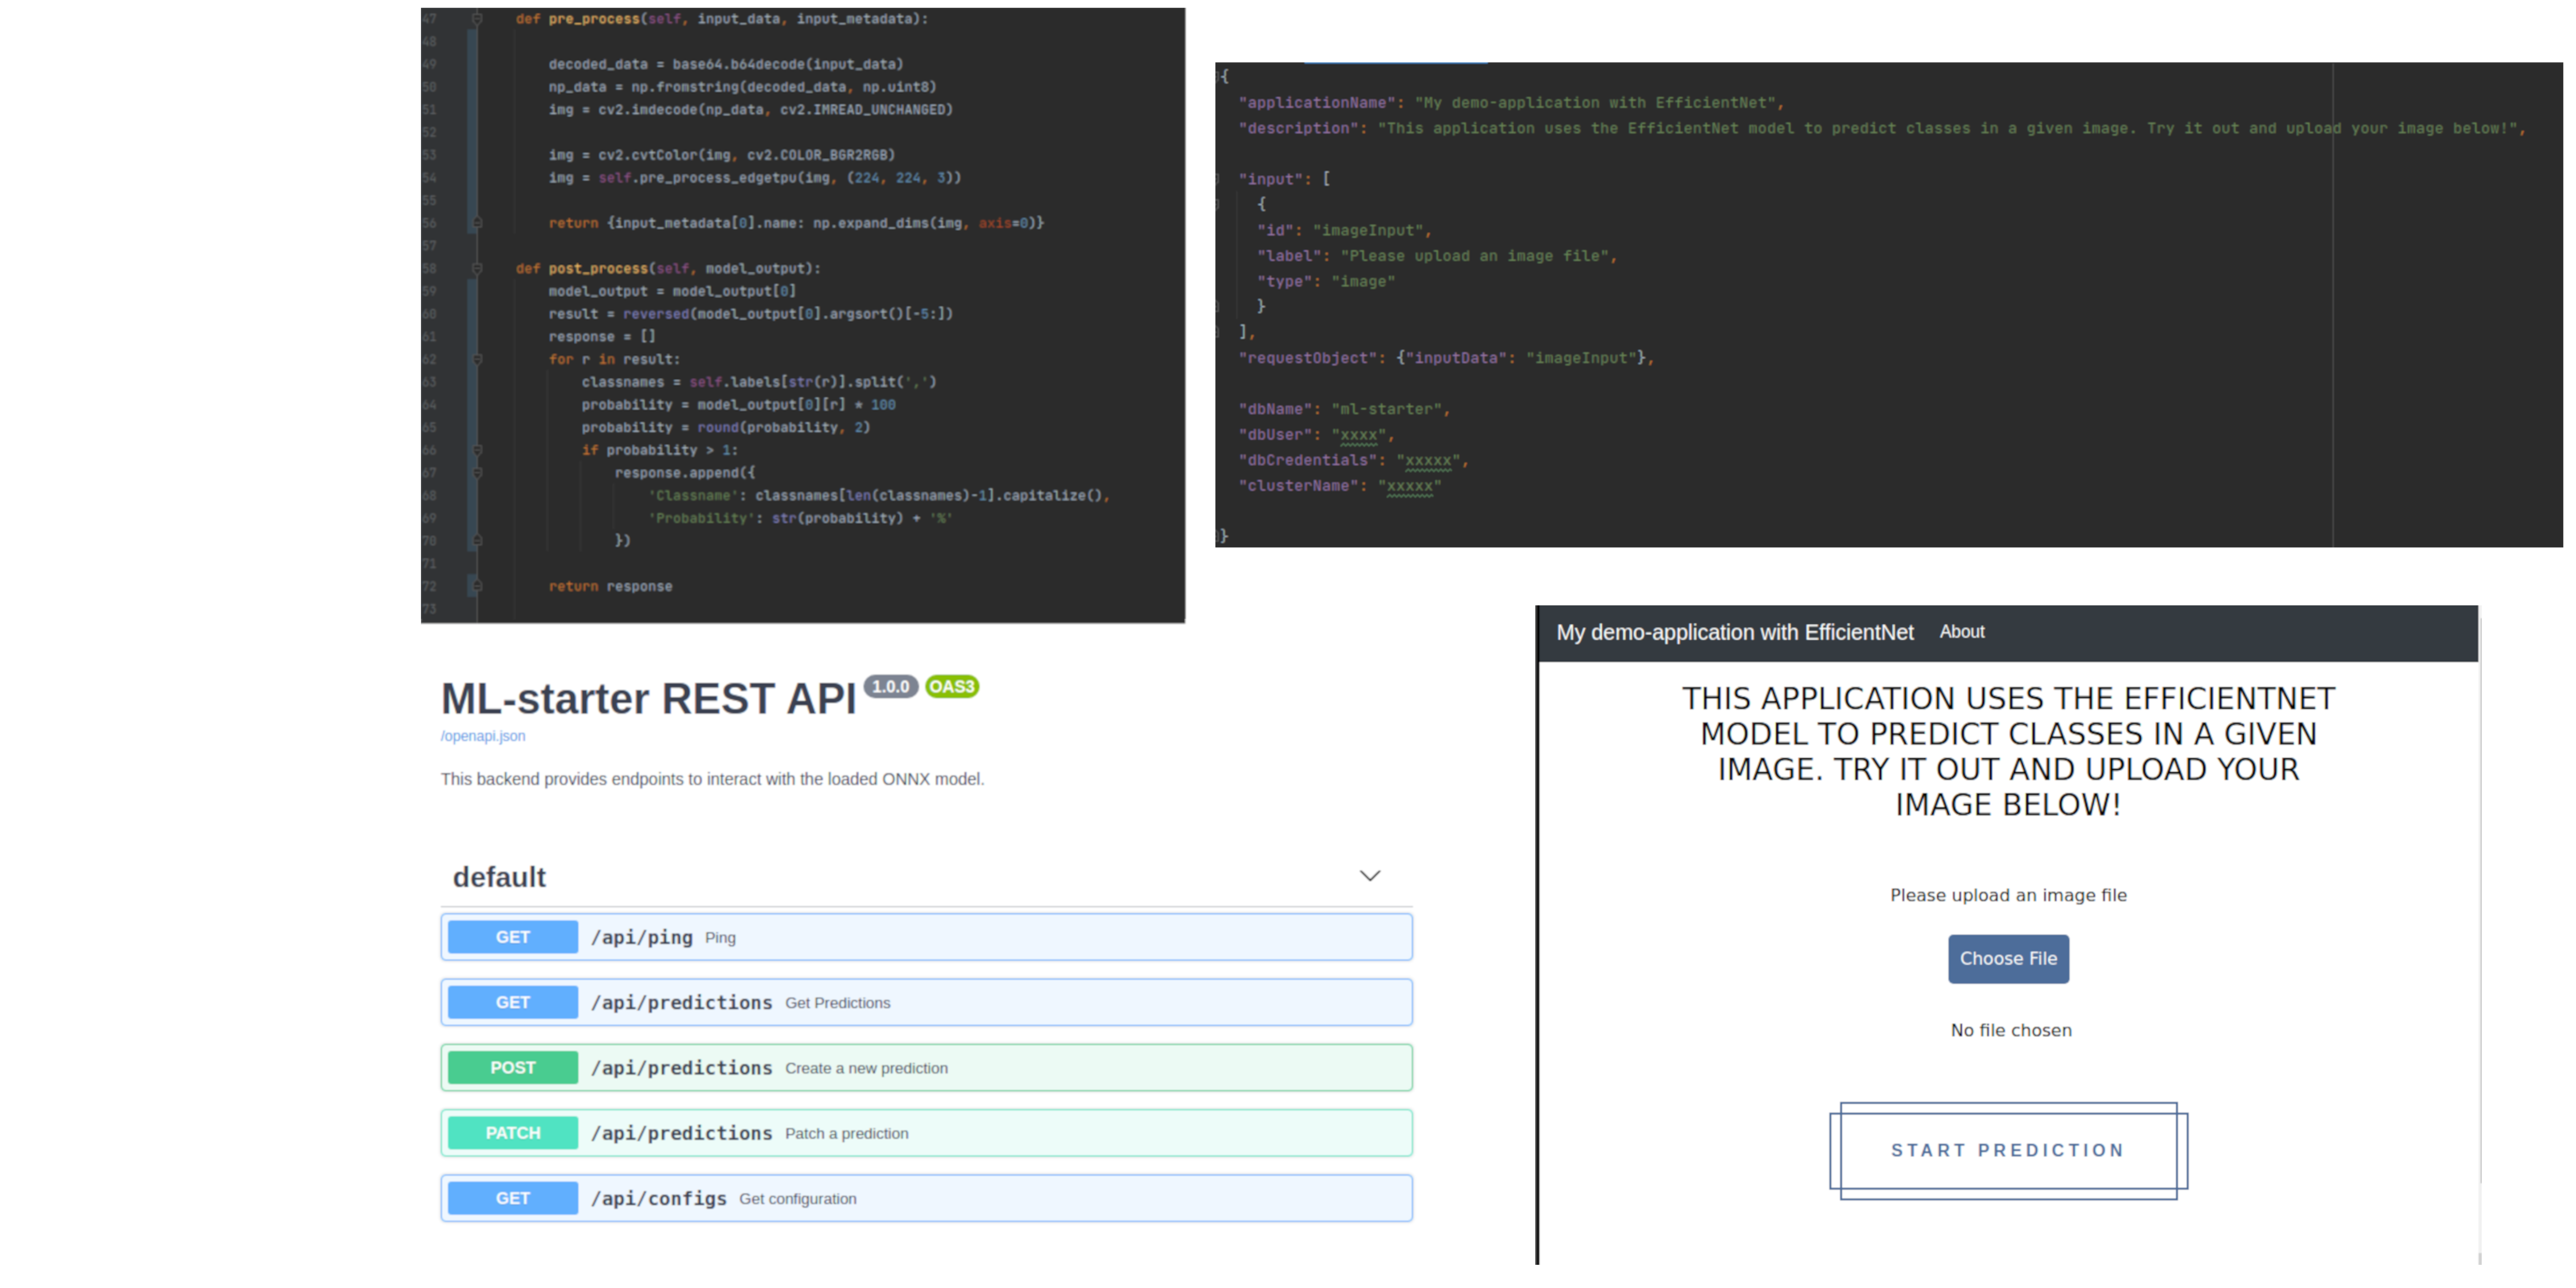
Open the project in your IDE and locate the custom_model.py file in the backend/app/custom_model folder. Now replace the contents of the file with the code below.
import numpy as np
from model.pmml_model import PMMLModel


class CustomModel(PMMLModel):

    def pre_process(self, input_data, model) -> dict:
        return input_data

    @staticmethod
    def post_process(model_output: object) -> object:
return model_output[0]Open the custom_requirements.txt file from the folder backend/app/custom_model and copy the required dependency of the pre- and postprocessing from below.
numpy~=1.19.5
Open the configMap.json file from the folder backend/app/custom_model. In order to define the desired user inputs and the structure of the requestObject you have to replace the content with the text below.
configMap.json
{
  "applicationName": "My demo-application with the basic Iris-Model",
  "description": "This is a basic regression model trained with the famous iris-data set. Please provide the measurement of a flower and start the prediction!",
  "input": [
    {
      "id": "input1",
      "label": "Flower 1, Sepal length",
      "type": "number"
    },
    {
      "id": "input2",
      "label": "Flower 1, Sepal width",
      "type": "number"
    },
    {
      "id": "input3",
      "label": "Flower 1, Petal length",
      "type": "number"
    },
    {
      "id": "input4",
      "label": "Flower 1, Petal width",
      "type": "number"
    }
  ],
  "requestObject": {
    "inputData": [
      "input1",
      "input2",
      "input3",
      "input4"
    ]
  }
}Docker makes the launch of the application very easy. Open the command line in the ml-starter/ directory and execute the following code. This will take a while.
docker build -t ml-starter-iris-pmml-example .
docker run -d -p 80:3000 -p 8800:8800 ml-starter-iris-pmml-example
If everything worked you should get the container-id as an output in the console:
#container-id, your output can look differently
7647e273167e69e6987cbf7c4f2393203af2f940bb058ae9084c4dcefb63571f
Let's try it!
Open your browser and access "localhost".
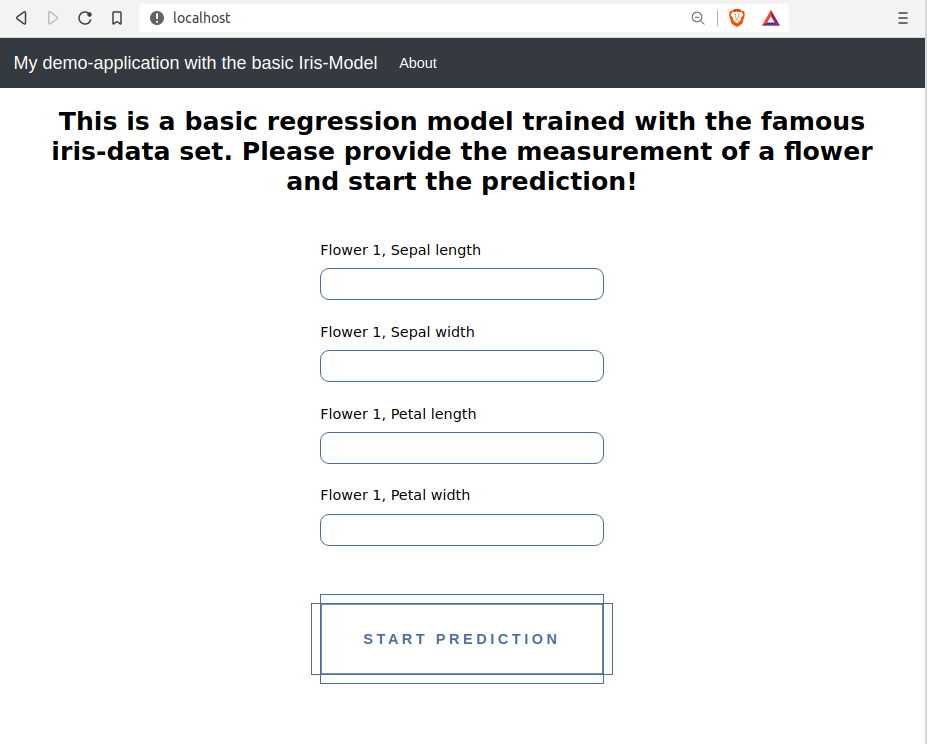
Now you can enter the measurements of an iris flower and start the prediction.
The result will be displayed like this:
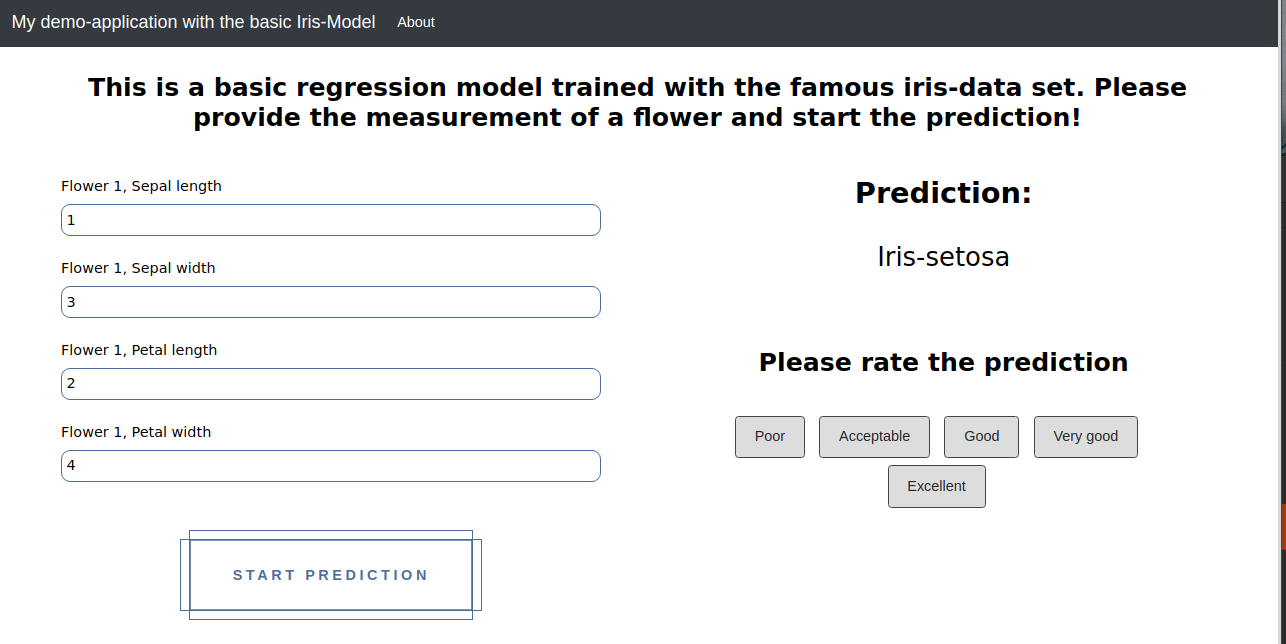 Note: This is the standard frontend - check the Customization section to integrate your custom html frontend.